Decoration ingredients:
- Ready to roll white icing
- Ready to roll icing in green and red for the decorations on top
- Icing sugar to dust
- Water (or edible glue if you have it)
- Rolling pin
(Your rolling pin may come in handy here to hit the bowl so the cake comes out!!!)
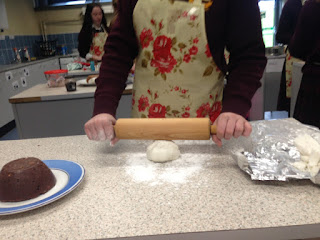
Sprinkle icing sugar on the counter/your worktop. Be sure to use plenty here as you don't want your icing sticking to the surface!
Take your white icing and your rolling pin and roll it out.
Once the icing is rolled out, you need to pick it up and place it on your cake. (This is the scariest maneuver in the recipe). When you've completed, your pudding should look like this:
Now for the creative bit. Using a knife, draw the contours and the curves you want your icing to make.
Keep going around the whole "pudding" until you have something like this
Green and red time!!!
Take your green icing (use a much smaller amount than you did for the white icing) and roll it out as you did with the white.
The goal here is to make holly leaves. A cutter would be handy. (I actually brought one with me to class but it was way too big for the pudding) If you don't have a cutter I'd recommend making a template to make your leaves. Or if you're feeling creative, brave or simply don't have the time to do so (like my cooking partner Tara and I were) you can cut the leaves freehand.
Stick your leaves to the white icing using water (or edible glue). We chose to add the veins to the leaves after sticking them on.
To make the red holly berries, simply take a small amount of red roll out icing and roll it using the palms of your hands until you make a ball.
Arrange your leaves and holly on the pudding (here's how we did it)
Sit back and enjoy your lovely chocolate biscuit pudding! Alternatively, you could use a muffin tin to make several small individual puddings.


Looks good
ReplyDeleteSounds good
Deletetastes good
ReplyDeleteFeels good
Delete